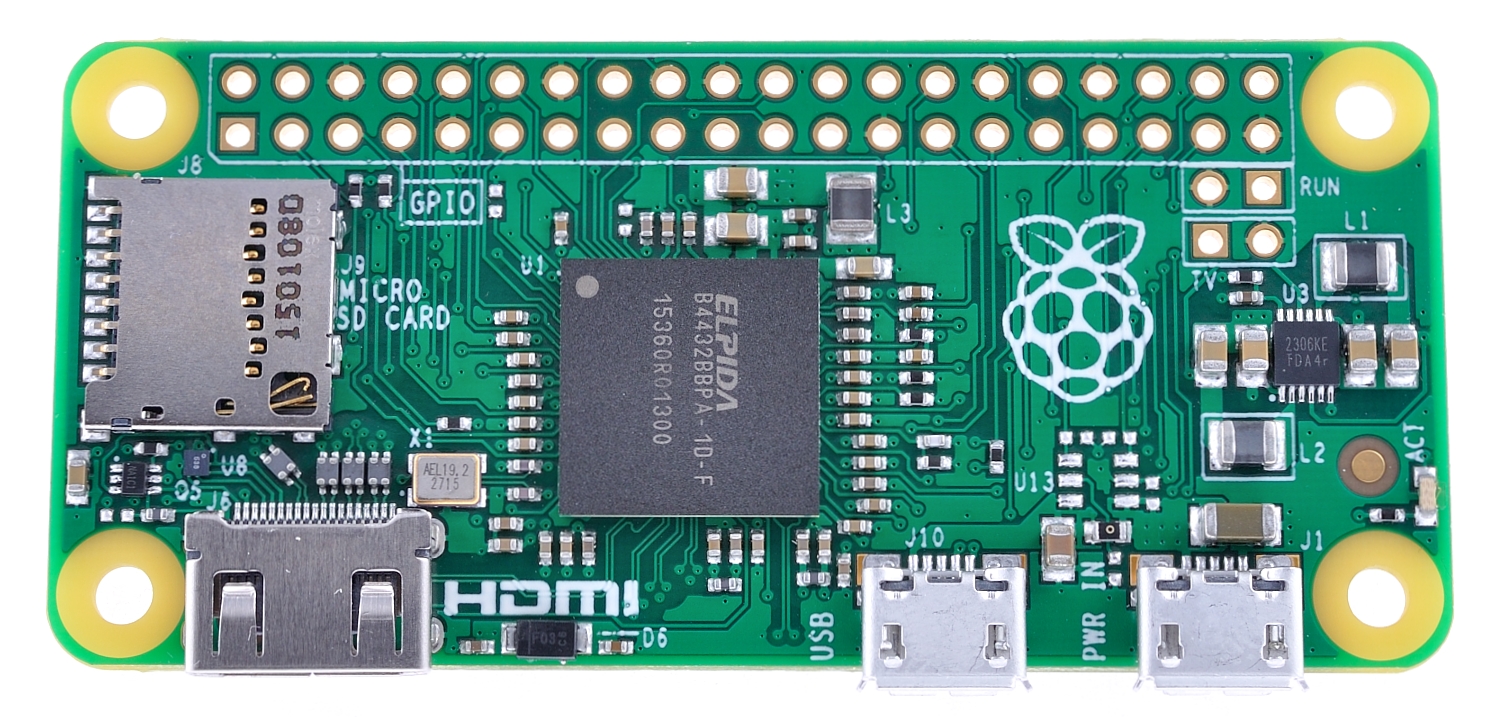
The Raspberry Pi Zero W is a cheap, light weight microcontroller developed by the Raspberry Pi Foundation. It was developed as a cheaper, smaller alternative to the original Raspberry Pi (now in version 3), and offers a similar interface and design. We’ll be working with the Raspberry Pi throughout this semester and will be developing a software and hardware to interface with it. Before we dive too far into specifics, its important to get your Pi up and running, and configured correctly.
Getting set up on the Raspberry Pi Zero W is relatively straightforward, and the packages we have provided for this class have a lot of the work already done for you. That being said, there are several steps that we’ll need to take to get everything up and running. Keep in mind that this is a blank computer that we’ll be working on, so installing packages and changing settings will be necessary along the way.
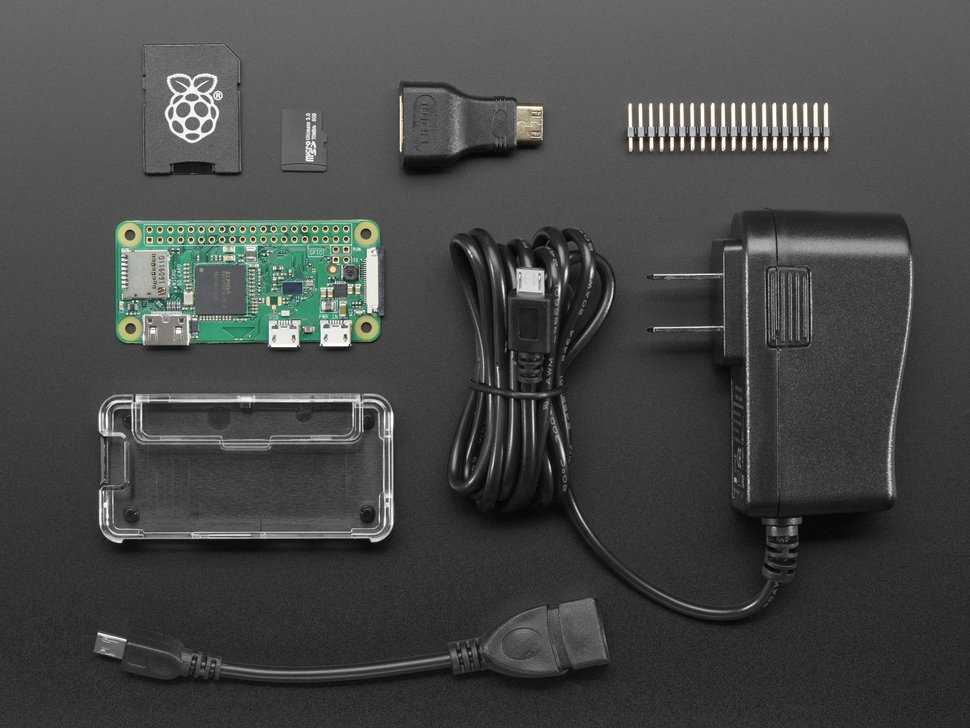
In your package, you should have received:
- 1 Mini HDMI to HDMI Adapter
- 1 USB OTG Cable
- 1 8GB micro SD Card with NOOBs Preinstalled (will go over next)
- 1 Pi Zero Enclosure with various covers
- 1 5V 1A Power Supply & USB A/Micro B Cable
- 2x20 Male header strip
We’ll first look at the micro SD card. This should have NOOBs installed on it already.
What is NOOBs?
NOOBS is an easy operating system installer which contains Raspbian. It also provides a selection of alternative operating systems which are then downloaded from the internet and installed.
We will use NOOBS to install the Raspbian operating system on our Pi.
What is Raspbian?
Raspbian is the Raspberry Pi Foundation’s official supported operating system. It is a flavor of the Linux operating system (an open source OS, much like MacOS)
Starting the PI
To start the pi, load the microSD card into the slot at the end of the board. Plug in the 5V power into the slot on the side of the board (there are two slots, look for the one that says “PWR” printed above it). Plug the mini HDMI to HDMI Adapter into the other slot and connect a HDMI cable to the TV.
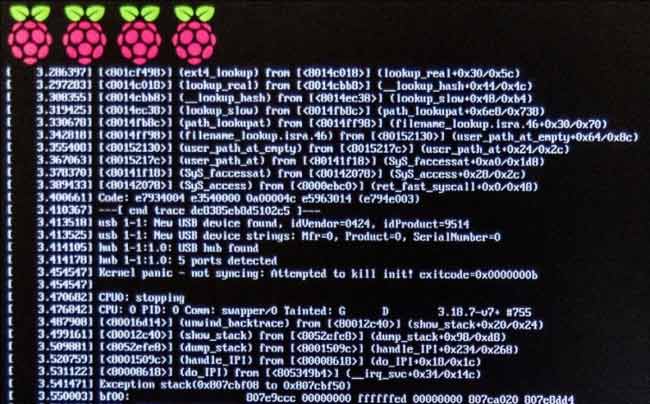
You should see a black screen with white text initalizing the OS in the upper left.
Loading the OS
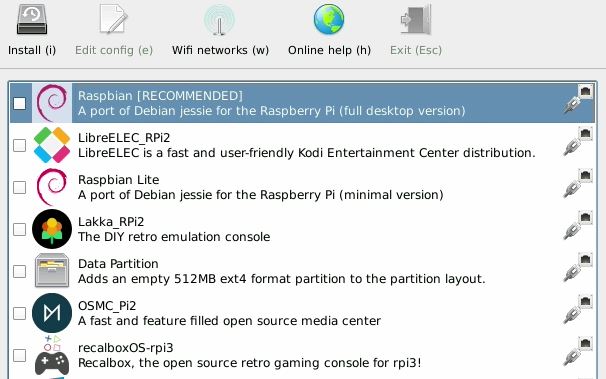
After loading you should see a screen with options for the operating system (there should only be one “Raspbian”). Click on it and let it load. The screen will then show some images with a loading bar. Kick back and relax while it loads for about 4 minutes.
After the OS is loaded, you should be taken to the desktop. If you’ve used or seen Ubuntu before, things should lok familiar. If not, take a second to navigate around the menus.
Changing the settings
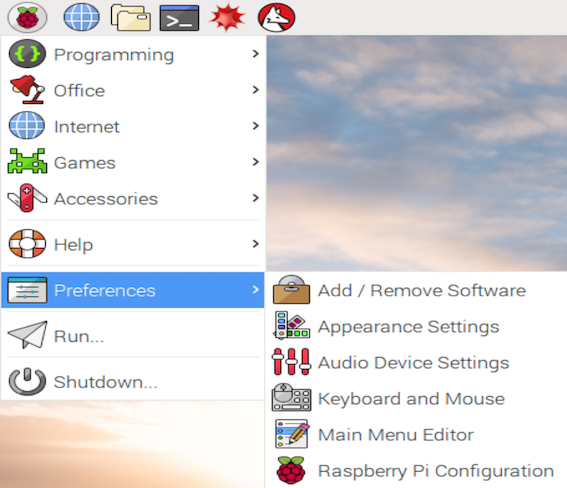
Off the bat, there are some initial settings that we will need to change. First, we will need to set the keyboard type. Raspberry Pi is British, we’ll have to switch to an American Keyboard so that we can navigate in terminal.
Go to the menu in the upper right. From the dropdown, select ‘Preferances’ and then ‘Keyboard and Mouse’. Change the keyboard to American.
Starting Wifi
Next we’ll need to set up wifi. Click the wifi symbol in the upper right and select ‘Duke’ wifi.
We’ll then have to register our Raspberry Pi with Duke?? Maybe not
Installing Packages
Next, well have to install several packages onto the OS to be able to interact with the pins on the board. Because the majority of this class will be developerd in python, we’ll be installing GPIO and other packages.
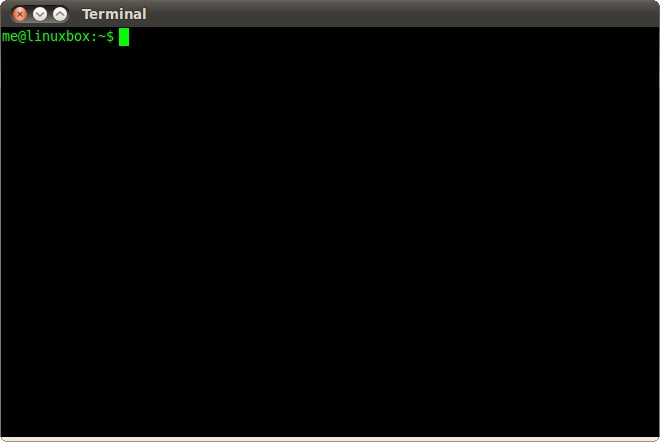
Go to the menu in the upper left, click the dropdown and open Terminal. Terminal is an application that allows us to work with our computer without an interface. We can navigate our computer, install packages, and start scripts without having to go to websites or click around with the mouse. Well dive into terminal in depth in later courses. For now, we’ll use some simple commands to install the packages we need. You should see your cursor blinking next ‘your-computer-name’$.
Type:
sudo apt-get update
this will update the current OS. Next run
sudo apt-get install python-rpi.gpio python3-rpi.gpio
This will install the python GPIO package. This package will allow us into interact with the pins on the board ( which we’ll solder on later). GPIO stands for ‘General-Purpose Input Output’.
To check that it is installed correctly, type
python
you should then be dropped into the python interactive shell. We can then run
import RPi.GPIO as GPIO
To check that package is present, type
GPIO.RPI_REVISION
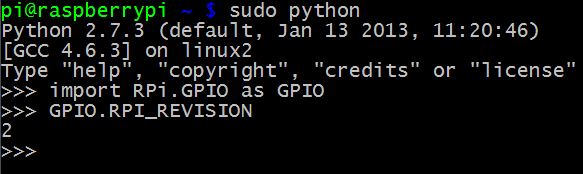
GPIO is a library that allows us to interact directly with the pins of our board. The GPIO library is relatively straitforward to use.
pip install paho-mqtt